
Writing reliable code is a challenge every developer faces. You want to be confident that your code works as expected without constantly worrying about bugs. Unit testing is a great way to address this. It makes it possible to check the smallest units of the application for bugs while programming.
According to the State of JavaScript 2023 survey, Jest is the most adopted JavaScript-oriented testing framework, where more than 59% of developers have used it and look forward to using it again. Jest is popular as it is fast and simple to use. Whether you’re working with simple functions or complex components, Jest makes the testing process more manageable. So, let's see how easily we can get started with Jest.

What is Jest?

Jest is a fast and easy-to-use testing framework exclusively made to test JavaScript applications. It was created by Facebook and quickly became one of the favorite frameworks of developers with its ability to handle everything from testing simple functions to complex components. Jest has 44K+ GitHub stars and more than 33 million weekly NPM downloads.
Why Use Jest for Unit Testing?
Jest offers an array of features, such as mock support, snapshot testing, and built-in test runners, allowing developers to start testing with minimal setup. It simplifies the testing process, making it easier for both beginners and experienced developers to write unit tests effectively. The framework's ease of use and comprehensive feature set make it ideal for testing the individual components of your JavaScript applications.
Why Unit Testing is Essential for Developers?
Unit testing remains one of the most important things in the software life cycle. It ensures that small, individual parts of your code (units) work correctly. Without unit testing, bugs can easily slip through to production releases, causing significant issues that are harder to fix.
Here are three key benefits of writing unit tests:
- Preventing Bugs Early: Catching bugs in individual components before they impact the entire system reduces the complexity of fixing issues.
- Ensuring Code Stability: Unit tests help you ensure that changes to your code won’t break existing functionality, making your codebase more stable.
- Faster Release Cycles: When you automate unit testing, you can iterate faster, ensuring quick feedback and more reliable software releases.
Advantages of Using Jest for Unit Testing
Jest stands out among JavaScript testing frameworks for several reasons, making it a top choice for developers.
- Fast Performance: Jest is designed to run tests in parallel. By making tests asynchronous, Jest reduces the time developers spend waiting for results.
- Built-in Mocking Abilities: Mocking allows developers to simulate external dependencies like APIs, databases, or even functions within the application. Jest has built-in mocking capabilities to simplify the process of isolating the code under test.
- Zero-Configuration Setup: You can simply install Jest via npm or yarn, and it’s ready to run tests.
- Snapshot Testing: With snapshot testing, Jest captures a component's output (or “snapshot”) and compares it to previously saved snapshots. This is particularly useful for front-end developers working with React components.
- Compatibility with Other Frameworks: Seamlessly integrates with popular JavaScript frameworks like Node.js, React, Vue, and Angular.
A Developer's Tutorial to Jest Unit Testing
Since you now have a good understanding of Jest, let's get started with writing unit tests with Jest. Here, I will be using a simple Node.js project to show you the features of Jest.
Prerequisites
Before you start writing Jest test cases, you need to ensure that your environment meets the following requirements:
- Node.js installed on your machine. You can download it from Node.js official website.
- npm (Node Package Manager) or yarn installed (which comes with Node.js by default).
How to Install Jest in Your JavaScript or Node.js Project
If you don’t have a project yet, initialize a new Node.js project:
mkdir jest-tutorial
cd jest-tutorial
npm init -y
This will create a package.json file for managing dependencies. Then, to install Jest as a development dependency, use either npm or yarn:
npm install --save-dev jest
or
yarn add --dev jest
Once Jest is installed, modify your package.json to add a script that runs Jest tests:
{
"scripts": {
"test": "jest"
}
}
Now, whenever you run npm test or yarn test, Jest will execute all test files in your project.
Writing Your First Unit Test
Let’s start by creating a simple function and testing it with Jest.
Create a src/sum.js file that exports a function for adding two numbers:
// src/sum.js
function sum(a, b) {
return a + b;
}
module.exports = sum;
Now, create a test file in the tests/ folder. By convention, Jest looks for files ending with .test.js or .spec.js Here, I will create a file named tests/sum.test.js:
// tests/sum.test.js
const sum = require('../src/sum');
test('adds 1 + 2 to equal 3', () => {
expect(sum(1, 2)).toBe(3);
});
This test checks whether the sum function returns the correct result when given the inputs 1 and 2. The expect() function is used to assert that the output equals 3.
How to Run Jest Tests
To run your tests, simply execute the following command:
npm test
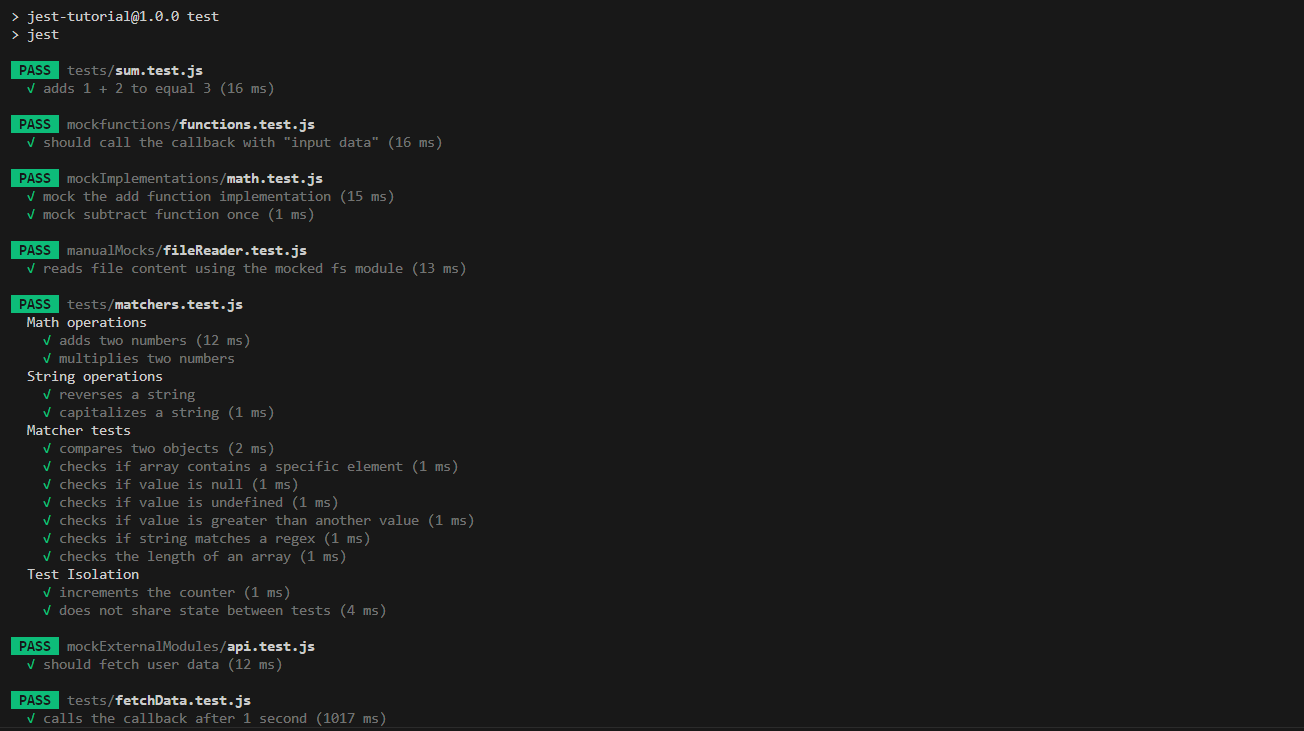
Jest will automatically find all test files and run the test cases. The resulting output will look something like this:
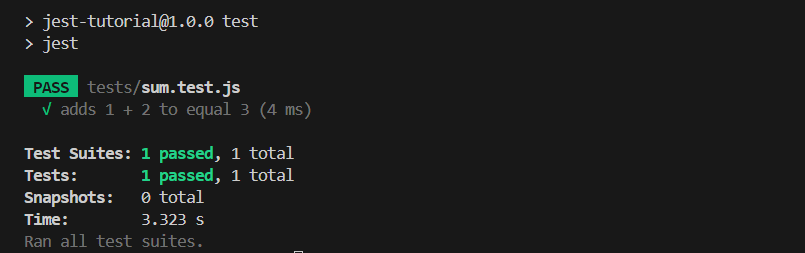
The summary shows that the test suite passed successfully. It includes the total number of test suites and test cases executed, along with their status.
Key Jest Concepts Every Developer Should Understand
As you can see, writing unit tests with Jest is pretty easy. However, when the functionalities get complex, you should have a good understanding of Jest's basic concepts. Here are the 4 main Jest concepts you should know before getting into the advanced features of Jest:
1. Test Suites
A test suite is a collection of related tests. Inside a .test.js file. You can organize multiple tests using the describe() block.
// math.test.js - This file is a test suite
describe('Math operations', () => {
test('adds two numbers', () => {
const sum = 2 + 3;
expect(sum).toBe(5); // Matcher
});
test('multiplies two numbers', () => {
const product = 2 * 3;
expect(product).toBe(6); // Matcher
});
});
In this example, the test suite is the entire file (math.test.js), and the describe() block groups related to test cases (addition and multiplication).
2. Test Cases
Each test() block defines an individual test case to check a specific function or behavior.
test('reverses a string', () => {
const reverseString = (str) => str.split('').reverse().join('');
expect(reverseString('hello')).toBe('olleh'); // Test case 1
});
test('capitalizes a string', () => {
const capitalizeString = (str) => str.charAt(0).toUpperCase() + str.slice(1);
expect(capitalizeString('world')).toBe('World'); // Test case 2
});
3. Matchers
Matchers are used to compare actual values with expected values. Jest provides various matchers for different types of data.
- toBe(): Used for primitive values.
expect(2 + 2).toBe(4);
- toEqual(): Used to compare objects or arrays.
const obj = { a: 1, b: 2 };
expect(obj).toEqual({ a: 1, b: 2 });
- toContain(): Checks whether an array or string contains a specific element.
expect(['apple', 'banana', 'cherry']).toContain('banana');
- toBeNull(): Used to check if a value is null.
expect(null).toBeNull();
- toMatch(): Checks if a string matches a regular expression or substring.
expect('Hello World').toMatch(/World/); // Regex match
expect('Hello World').toMatch('World'); // Substring match
4. Test Isolation
Jest provides several hooks to achieve test isolation within a test suite. For example, you can use the beforeEach hook to reset the value of a variable before each test case.
describe('Test Isolation', () => {
let counter;
// This runs before each test to reset the counter
beforeEach(() => {
counter = 0;
});
// Test Case: Incrementing the counter
test('increments the counter', () => {
counter += 1;
expect(counter).toBe(1); // Counter is incremented here
});
// Test Case: Counter should reset for each test (Test Isolation)
test('does not share state between tests', () => {
expect(counter).toBe(0); // Counter resets to 0 in each test
});
});
Here are some other hooks provided by Jest for test case isolation:
- afterEach(): Runs after each individual test in a test suite.
- beforeAll(): Runs once before all the tests in a test suit.
- afterAll(): Runs once after all the tests in a test suite.
How to Test Asynchronous Code in Jest
Testing asynchronous codes is a challenging task. However, Jest makes this pretty simple with its built-in features for testing promises, callbacks, and async/await.
1. Testing Promises with Jest
Every time you return a promise in your test, jest will wait for that promise to either resolve or be rejected. If the promise resolves, the test continues, and if it is rejected, the test fails. Jest also provides special matchers like .resolves and .rejects for promises, allowing assertions on resolved or rejected values.
test('resolves to "Data received"', () => {
return fetchData().then((data) => {
expect(data).toBe('Data received');
});
});
test('the data is "Data received" using resolves', () => {
return expect(fetchData()).resolves.toBe('Data received');
});
test('the promise is rejected using rejects', () => {
return expect(Promise.reject('Error occurred')).rejects.toBe('Error occurred');
});
- In the first test, returning the promise allows Jest to wait until it resolves.
- In the second test, the .resolves matcher simplifies writing promise assertions.
- In the third test, .rejects allows testing rejected promises directly.
2. Testing Asynchronous Callbacks with Jest
Jest provides a done() callback in test functions, which must be called when the asynchronous operation (callback) finishes.
test('calls the callback after 1 second', (done) => {
function callback(data) {
expect(data).toBe('Data received');
done(); // Mark test as done after the callback is called
}
fetchData(callback);
});
In this example, the done() function ensures that the test does not finish until the callback inside fetchData() is called.
3. Testing Async/Await with Jest
Jest supports async functions and awaits inside tests, so you can write asynchronous tests naturally and synchronously. You can use await for promises; if the promise is resolved or rejected, the test will proceed accordingly.
test('fetches data using async/await', async () => {
const data = await fetchData();
expect(data).toBe('Data received');
});
test('fetches data with an error', async () => {
async function fetchData() {
throw new Error('Error occurred');
}
await expect(fetchData()).rejects.toThrow('Error occurred');
});
- In the first test, await pauses execution until the fetchData promise resolves, and then the assertion checks the result.
- In the second test, await is used along with .rejects to assert that an error is thrown in the case of a rejected promise.
Mocking in Jest: How to Mock APIs and External Dependencies
Mocking is an essential part in software testing. It allows you to simulate external services, such as APIs or databases, to isolate the logic you want to test. Here is how mocking works in Jest:
1. Mock Functions
Jest allows you to create mock functions using jest.fn() These are useful for testing interactions between parts of your code without executing the real implementation.
// functions.test.js
const { processData } = require('./functions');
test('should call the callback with "input data"', () => {
const mockCallback = jest.fn();
processData(mockCallback);
expect(mockCallback).toHaveBeenCalledWith('input data');
});
2. Mocking External Modules
When working with APIs or external dependencies like axios, you can mock these modules using jest.mock() This allows you to simulate API responses or database results without actually making real requests.
// api.test.js
const axios = require('axios');
const { getUser } = require('./api');
jest.mock('axios');
test('should fetch user data', async () => {
const mockUser = { id: 1, name: 'John' };
axios.get.mockResolvedValue({ data: mockUser });
const result = await getUser(1);
expect(result).toEqual(mockUser);
});
3. Mock Implementations
mockImplementation() or mockResolvedValue()can be used to modify the behavior of mock functions. These methods allow you to define the response of the mock or how it will work under given conditions.
const mockFetch = jest.fn().mockImplementation(() => Promise.resolve('data'));
expect(mockFetch()).resolves.toBe('data');
4. Manual Mocks
Manual mocks are useful when you want to manually define behavior for certain modules rather than relying on Jest's automatic mocking. For instance, if you want to mock filesystem interactions, you can create a custom mock for Node's fs module.
By mocking the API, you can ensure your tests run independently of the actual service, providing more reliable results.
// mocks/fs.js
const fs = jest.createMockFromModule('fs');
fs.readFileSync = jest.fn(() => 'mocked data');
module.exports = fs;
// test.js
jest.mock('fs');
const fs = require('fs');
expect(fs.readFileSync()).toBe('mocked data');
You can find a complete runnable test suite with the above examples in this GitHub repository.
Debugging and Troubleshooting Strategies in Jest
Jest comes with several built-in features to help you when test cases fail:
- Verbose Mode: Shows detailed information about each test:
npm test -- --verbose
- Watch Mode: Reruns tests automatically as you change your code:
npm test -- --watch
- Interactive Debugging: Jest integrates well with debuggers, such as the Node.js debugger, making it easier to pinpoint where issues occur. Example command to run Jest in watch mode:
npm test -- --watch
Best Practices for Writing Efficient Jest Unit Tests
- Keep Tests Independent: Ensure each test is isolated from others.
- Test Edge Cases: Write tests for boundary or unexpected inputs to ensure robustness.
- Use Descriptive Test Names: Clear test names make debugging easier.
- Mock External Dependencies: Avoid testing actual APIs to reduce dependencies and speed up tests.
- Clean Up After Tests: Reset any global states to avoid side effects between tests.
Pro Tip: Use .only or .skip during development to focus on specific tests:
test.only('run this test only', () => {
// test code
});
test.skip('skip this test', () => {
// test code
});
How Early Helps Streamline Jest Unit Testing

Early enhances Jest unit testing by automating the generation and execution of tests through Generative AI. This drastically reduces developers' time writing tests while ensuring high code coverage. With real-time analysis and seamless integration into IDEs like VSCode, Early allows developers to quickly identify issues, optimize code quality, and streamline CI/CD workflows. This leads to faster, more reliable software releases without sacrificing test quality.
Overall, Early helps developers focus more on writing application code while ensuring that their Jest unit tests are robust, comprehensive and maintain high code quality standards.
Mastering Unit Testing with Jest
Jest simplifies the process of ensuring your code is reliable, helping you catch bugs early and maintain code stability. By adopting best practices like test isolation and understanding key concepts such as matchers and asynchronous testing, you can enhance the quality of your unit tests. However, manually writing and managing tests can be time-consuming.
That’s where Early comes in. With its AI-powered automation, Early can generate comprehensive Jest tests in minutes, ensuring higher code coverage and faster development cycles. Explore Early’s innovative solutions today to further streamline your unit testing process and boost code quality!